In this post, I will explain how to create a custom control in silverlight. The control we create is a simple control which will draw a circle, the radius of the circle is controlled through the exposed public property.
This is a simple control, but hope this will give you an idea about the approach to the custom control development in silverlight.
Create a the Silverlight class library project first
I have named the solution and project as SimpleControl, after the class library is created, you will get a default class Class1.cs delete that file. We don’t need that one; we will be creating a new one later.
Add a new text file to the project and give it’s name HostingSurface.xaml

This xaml file is the root canvas for our control. After completing this, you have change the build action for this xaml file. Change the build action to Embedded Resource
Now we will, create the canvas using the xaml code…
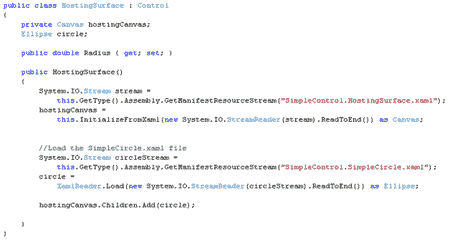
Inside this canvas, we will place the circle element that we are going to create. Next, we need to create a class that will, does the actual rendering logic. For that, create a class called HostingSurface.xaml.cs
Derive that class from the base “Control” class and we need two variables hostingCanvas and circle. hostingCanvas will point to the root canvas we created in the xaml file. And the circle variable, will hold the actual Ellipse element. We have created a public property Radius which will control the radius of our circle. We will implement this later. Now, we need to load the xaml file and need to initialize the hostingCanvas variable. For that we use the InitializeXaml(…) function.

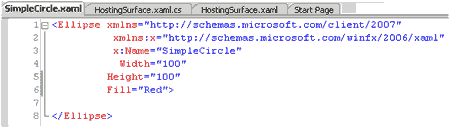
Since, we want to separate the rendering xaml from the code, for that purpose we are going to add a xaml file called SimpleCircle.xaml into the project. Otherwise, you can hardcode this string value in the class file itself, doing that will make the code unmanageable. Mark this xaml file as embedded resource.
Then create an Ellipse element. Here we have created an Ellipse element with Width and Height 100 pixels and filled it with the red color.
We want this file to be loaded, for that go to the HostingSurface.xaml.cs file and read the embedded SimpleCircle.xaml file and convert into a Ellipse element. Here we have used XamlReader.Load(…) method to do this. After the circle variable is initialized, we add that element to the root canvas of our control (“hostingCanvas”).
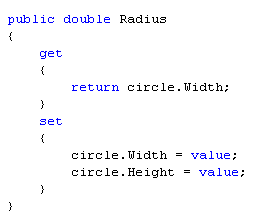
Now, we have the circle element. And we have to update the Width and Height when the value of Radius is set.
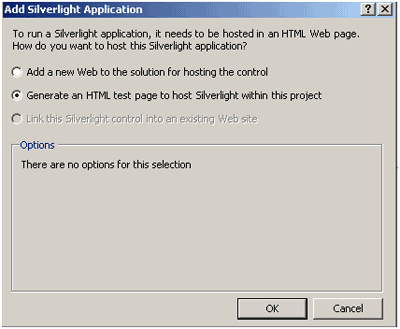
And we have completed the simple control. For testing this we need a Silverlight Application project. So create a silverlight application project and add that to our solution. Use the “Generate an HTML test page” option while creating this project.
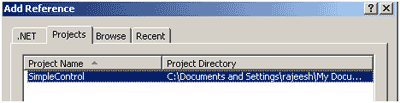
Add the SimpletControl reference to the newly created siliverlight application project.
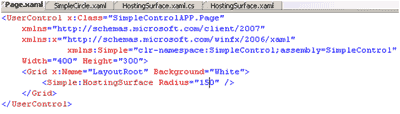
You need to add, the namespace in the Page.xaml, like this xmlns:Simple="clr-namespace:SimpleControl;assembly=SimpleControl and add our new control also to the page.xaml
Now run the application, you can see a red circle inside a black rectangle. Hope you all got some fair idea about the custom control development in silverlight. I have included complete screen shot, to just make sure everyone understand the flow.
You can download the complete source code from here